Reverse Sear a Steak: Perfect Thick Cuts

The reverse sear is the most reliable way to cook a thick steak. Instead of searing first and finishing in the oven, you flip the order. Start low in the oven, then finish with a blazing hot sear. The result is edge-to-edge pink with a deep, golden crust. This guide covers which cuts to use, the full method, and why it works better than any other approach.
Reverse Sear a Steak: Why It Works
Traditional searing starts with a hot pan. However, the problem is that high heat on a cold steak creates a grey band of overcooked meat between the crust and the pink centre. Specifically, the outer half-inch cooks to well-done before the middle reaches medium-rare. The reverse sear eliminates that grey band entirely.
By starting in a low oven, the entire steak warms gently and evenly. As a result, every layer reaches the same temperature at the same time. Then the final sear adds the crust without pushing the interior past your target. As a result, you get a steak that looks pink from edge to edge with a thin, crispy shell on the outside. Furthermore, the low oven dries the surface, which means the sear happens faster and deeper.
Which Cuts to Reverse Sear
The reverse sear works best on steaks at least 1.5 inches thick. After all, thin steaks cook too fast in the oven and overshoot the target temperature. Tomahawk is the ideal candidate. The thick ribeye and long bone make it dramatic on the plate. Moreover, the even thickness of a tomahawk means perfectly uniform doneness.
Ribeye at 1.5 to 2 inches thick also performs beautifully. The fat cap renders slowly in the oven and crisps during the sear. Similarly, chateaubriand benefits from the gentle oven heat because the tenderloin dries out easily with high-heat methods. Plus, filet mignon at two inches or thicker is another strong choice since the mild flavour pairs well with the deep crust the sear creates.
The Full Reverse Sear Method
Step One: Season Early
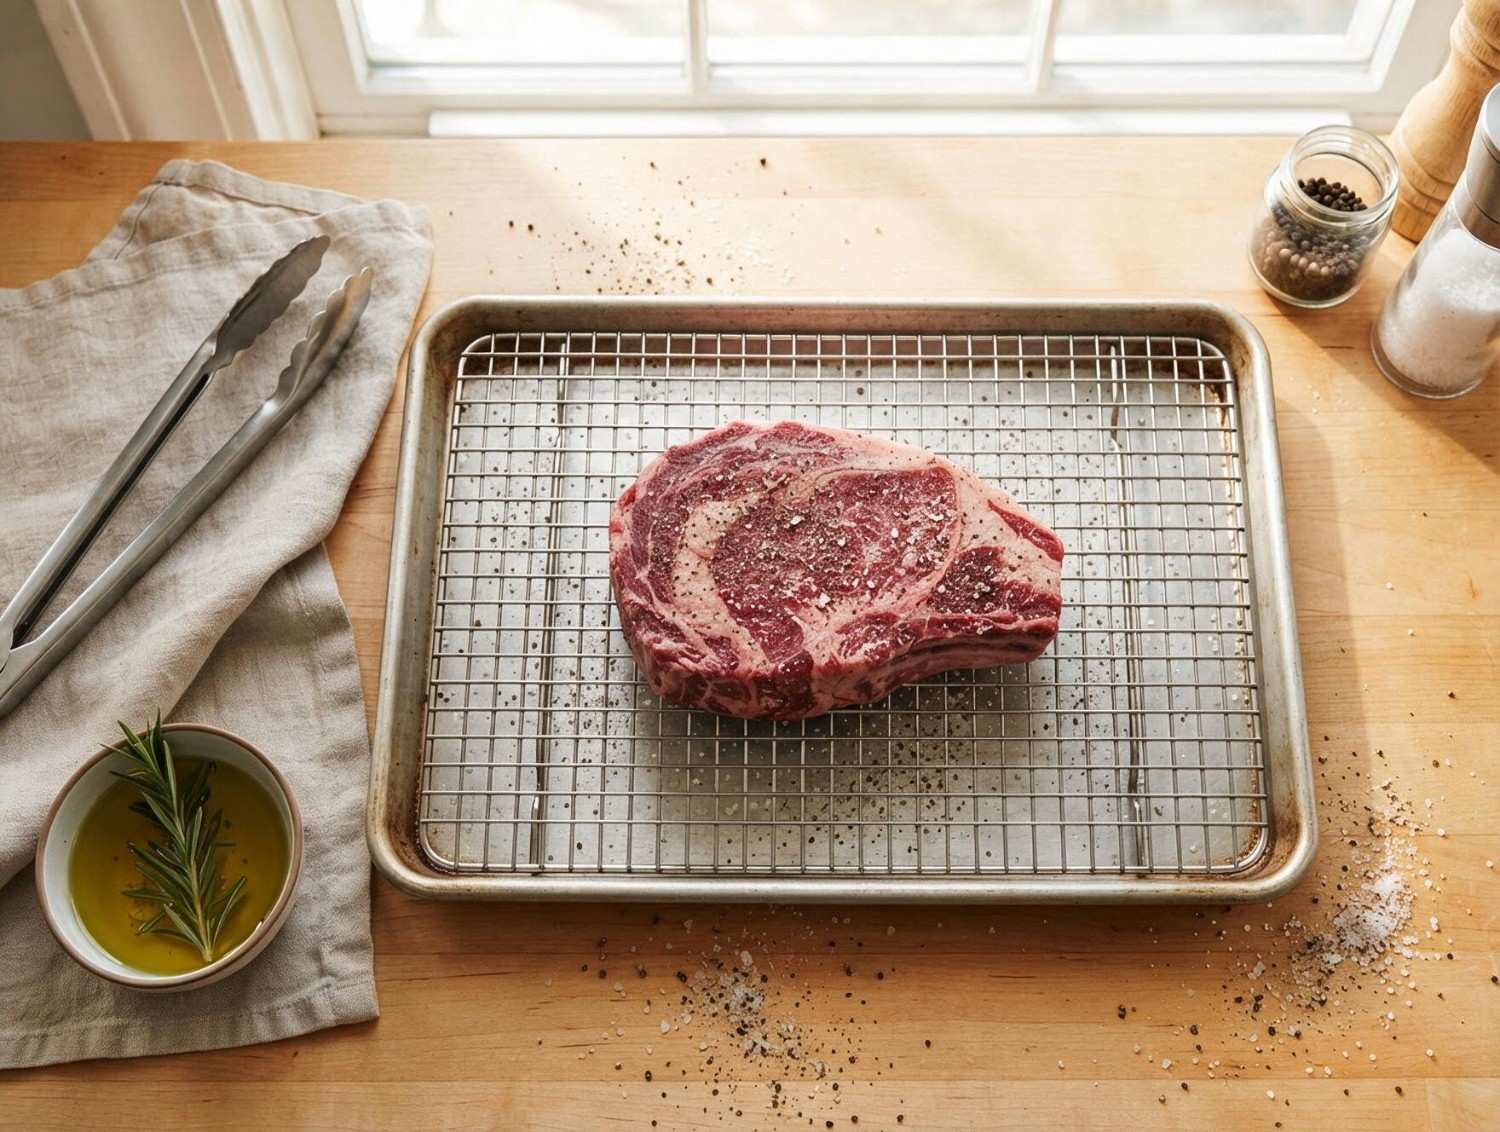
For a great reverse sear, season the steak with coarse salt and pepper at least 45 minutes before cooking. Consequently, the salt draws out moisture, which gets reabsorbed into the meat. Consequently, the flavour penetrates deeper than a last-minute sprinkle. Then pat the surface dry with paper towels just before it goes into the oven.
Step Two: Low Oven
For the reverse sear, set the oven to 250°F. Place the steak on a wire rack over a sheet pan. Specifically, the rack lifts the meat so air circulates underneath. Notably, this prevents a soggy bottom and ensures even cooking on all sides. Cook for 30 to 45 minutes depending on thickness. Use a meat thermometer and pull when the centre hits 10 to 15 degrees below your target.
Step Three: Rest Before the Sear
In the reverse sear method, let the steak rest on the rack for five minutes after the oven. This is not the final rest. Instead, this pause lets the surface cool slightly so the sear builds a thicker crust without overcooking the interior. Above all, skip this step and you lose the edge-to-edge pink you worked to achieve.
Step Four: The Sear
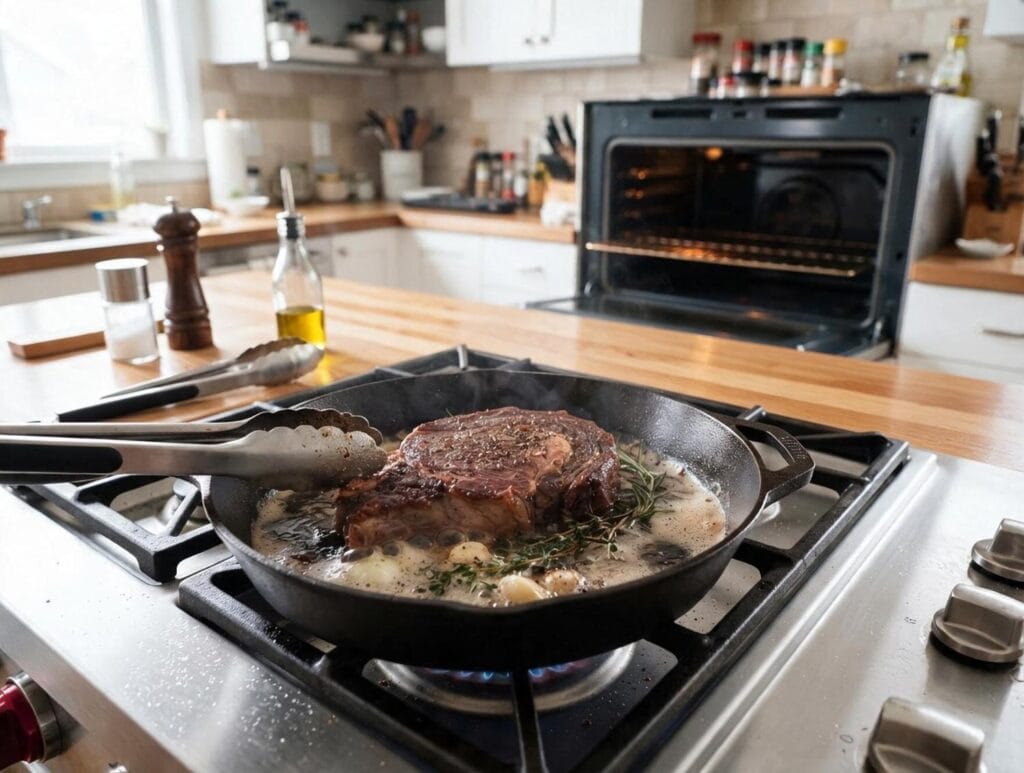
For the reverse sear finish, heat a cast iron pan until it just starts to smoke. Add a thin layer of avocado oil or clarified butter. Then place the steak down and sear for 60 to 90 seconds per side. Then add butter, garlic, and fresh thyme to the pan. Next, tilt and baste the steak with the foaming butter for 30 seconds. Hence, the crust develops a deep golden colour and rich, nutty aroma in under three minutes total.
Step Five: Final Rest and Serve
After the reverse sear, rest the steak for five minutes on a cutting board. The temperature continues to rise during this time. Therefore, pulling at 120°F in the oven gives a final reading of 130°F after searing and resting — perfect medium-rare. Slice against the grain if carving for a group, or serve the whole steak on the plate.
Temperature Guide for the Reverse Sear
For the reverse sear, pull the steak from the oven at these temperatures. The sear and rest add 10 to 15 degrees.
Rare: pull at 105°F, final 115 to 120°F. Medium-rare: pull at 115°F, final 125 to 130°F. Medium: pull at 125°F, final 135 to 140°F. Medium-well: pull at 135°F, final 145 to 150°F.
The reverse sear demands a meat thermometer. In addition, check safe temperatures at the Government of Canada food safety page. Guessing by touch or timing leads to inconsistent results, especially with thick cuts where the margin for error is small.
Reverse Sear vs Traditional Sear
The traditional method sears first, but flips the order. The traditional finishes in the oven. Notably, it works fine for steaks under 1.5 inches. However, for anything thicker, the reverse sear wins on three counts. First, you eliminate the grey band. Second, the dry oven surface produces a better crust. Third, you have more control because the steak warms slowly. There is no moment where 30 extra seconds ruins the cook.
Shop Thick Cuts at Boucherie Beirut
At Boucherie Beirut in Laval, we hand-cut every steak to the right thickness for the reverse sear. Browse our wagyu collection, Certified Angus range, and full beef collection. Visit our online shop for delivery across Greater Montreal. All our beef is certified and prepared fresh at our Laval shop.
Frequently Asked Questions
What temperature do I set the oven for a reverse sear?
250°F. This reverse sear temperature warms the steak gently and evenly without overcooking the edges. Cook for 30 to 45 minutes depending on thickness.
Can I reverse sear on a grill?
Yes. The reverse sear works on a grill too. Set up indirect heat on one side. Place the steak on the cool side with the lid closed at 250°F. After 30 to 40 minutes, move it to the hot side and sear for 60 to 90 seconds per side.
How thick should a steak be for the reverse sear?
The reverse sear needs at least 1.5 inches. Anything thinner cooks too quickly in the oven and overshoots the target. Tomahawk, thick-cut ribeye, and chateaubriand are ideal choices.